Brother XL2600i Sewing Machine: A Comprehensive Manual Guide (Updated 02/07/2026)
Welcome! This manual provides a detailed overview of the Brother XL2600i, assisting you in maximizing its 25-stitch capabilities for all your sewing projects.
Congratulations on acquiring the Brother XL2600i sewing machine! This user-friendly, 25-stitch machine is designed for both beginners and experienced sewists. This comprehensive manual will guide you through every aspect of operation, from initial setup to advanced techniques. The XL2600i boasts a free-arm design, enhancing versatility for cuffs, collars, and other cylindrical projects.
This manual, updated as of February 7th, 2026, aims to provide clear, concise instructions, ensuring a smooth and enjoyable sewing experience. We’ll cover essential topics like threading, bobbin winding, stitch selection, and troubleshooting common issues. Resources like Manualzilla offer additional support and archived manuals. Prepare to unlock your creative potential with this reliable and adaptable sewing companion!
What’s Included in the Box
Upon opening your Brother XL2600i package, you should find the following components. Firstly, the XL2600i sewing machine itself, ready for setup. Included are a set of needles, ensuring you’re prepared for various fabric types. You’ll also receive a spool pin cap, a bobbin, and a bobbin winder. A set of presser feet are provided, offering versatility for different sewing applications.
Furthermore, the box contains a screwdriver for basic maintenance and adjustments. A cleaning brush is also included to keep your machine operating smoothly. Of course, this comprehensive manual is present to guide you. Finally, a foot controller allows for precise speed control during sewing. Verify all items are present before proceeding; consult the retailer if anything is missing.
Safety Precautions
Important Safety Instructions: Always disconnect the power supply before cleaning or changing the needle. Never operate the machine with a damaged cord or plug. Keep fingers away from moving parts during operation to prevent injury. Do not pull the fabric while sewing; let the machine feed it naturally.
Ensure the machine is placed on a stable, level surface during use. Supervise children closely when the machine is in operation, or keep it out of their reach. Never insert any object into any opening of the machine. Avoid sewing over pins or thick materials, as this can damage the needle. If the machine malfunctions, discontinue use and consult a qualified technician.
Machine Components & Their Functions
Explore the machine! This section details each part – from the power switch to the stitch dial – explaining its crucial role in operation.
Power Switch & Foot Controller
Powering Your Machine: The Brother XL2600i features a simple on/off power switch, typically located on the machine’s side or back. Ensure the switch is in the ‘off’ position before plugging in the power cord to prevent accidental activation. The foot controller is your primary speed regulator; gentle pressure yields slower stitching, while increased pressure increases speed.
Foot Controller Operation: The foot controller isn’t a simple on/off device. It’s a variable speed control. Practice using it to achieve consistent stitching speeds. Avoid abrupt changes in pressure for smoother results. The controller connects to the machine via a cord; ensure this connection is secure before operation. Always unplug the machine when not in use, and never operate the foot controller with wet feet.
Safety First: Never force the foot controller. If it feels stiff or unresponsive, consult the troubleshooting section of this manual.
Spool Pin & Bobbin Winder
Spool Pin Function: The spool pin securely holds your thread spool during sewing. It typically features a cap to prevent the spool from slipping off. Ensure the spool rotates freely. Different sized spools may require the use of the spool cap’s larger or smaller opening for stability.
Bobbin Winding Process: The Brother XL2600i’s bobbin winder efficiently prepares bobbins for sewing. First, place the thread spool on the spool pin. Then, guide the thread through the tension disc and onto the bobbin. Engage the bobbin winder by pushing the bobbin winder stem to the right.
Winding Completion: Press the foot controller gently to start winding. The machine will automatically stop when the bobbin is full. Disengage the winder and remove the bobbin.
Thread Tension Control
Understanding Thread Tension: Proper thread tension is crucial for forming balanced stitches. Incorrect tension leads to looping, puckering, or thread breakage. The Brother XL2600i features an adjustable dial to control the upper thread tension.
Adjusting the Tension Dial: The dial typically has numbers; higher numbers increase tension, while lower numbers decrease it. Start with the default setting (usually ‘4’ or ‘5’). Test sew on a scrap fabric.
Identifying Tension Issues: If the bobbin thread pulls the upper thread to the underside, the upper tension is too loose. If the upper thread forms tight loops on the underside, the tension is too tight. Adjust the dial incrementally until balanced stitches are achieved. Always re-thread if adjustments don’t resolve the issue.
Needle & Presser Foot
Needle Selection: The Brother XL2600i utilizes standard 130/705H needles. Choose the correct needle size based on your fabric weight. Lighter fabrics require smaller needles (e.g., size 8 or 9), while heavier fabrics need larger ones (e.g., size 11 or 14). Always use a new, sharp needle for optimal stitch quality.
Changing the Needle: Loosen the needle clamp screw, remove the old needle, and insert the new one with the flat side facing the back. Tighten the screw securely.
Presser Foot Attachment: The presser foot snaps onto the presser shank. Different presser feet are available for specialized tasks like zippers or buttonholes. Ensure the foot is securely attached before sewing. Adjust presser foot pressure if needed for delicate fabrics.
Stitch Selection Dial
Navigating Stitch Options: The stitch selection dial on your Brother XL2600i allows you to choose from 25 built-in stitches. Rotate the dial to the desired stitch number, clearly indicated on the machine’s faceplate. These stitches include straight stitch, zigzag stitch, and various decorative options.
Stitch Length & Width: After selecting a stitch, adjust the stitch length and width using the corresponding dials. Longer stitch lengths are suitable for heavier fabrics, while shorter lengths are ideal for delicate materials. Zigzag width controls the breadth of the zigzag pattern;
Reference the Stitch Chart: Consult the stitch chart included with your machine to understand the best application for each stitch. Experiment with different settings to achieve your desired results.
Reverse Stitch Lever
Securing Seams with Reverse: The reverse stitch lever, conveniently located near the handwheel, allows you to reinforce the beginning and end of your seams. Press and hold the lever while sewing to automatically stitch in reverse.
Preventing Fabric Unraveling: Backstitching creates a secure knot of thread, preventing the seam from unraveling during use and washing. Typically, a few reverse stitches at the start and finish are sufficient.
Controlled Backstitching: Release the lever to return to forward stitching. Practice controlling the lever for smooth transitions between forward and reverse. This feature is crucial for durable and professional-looking sewing projects.
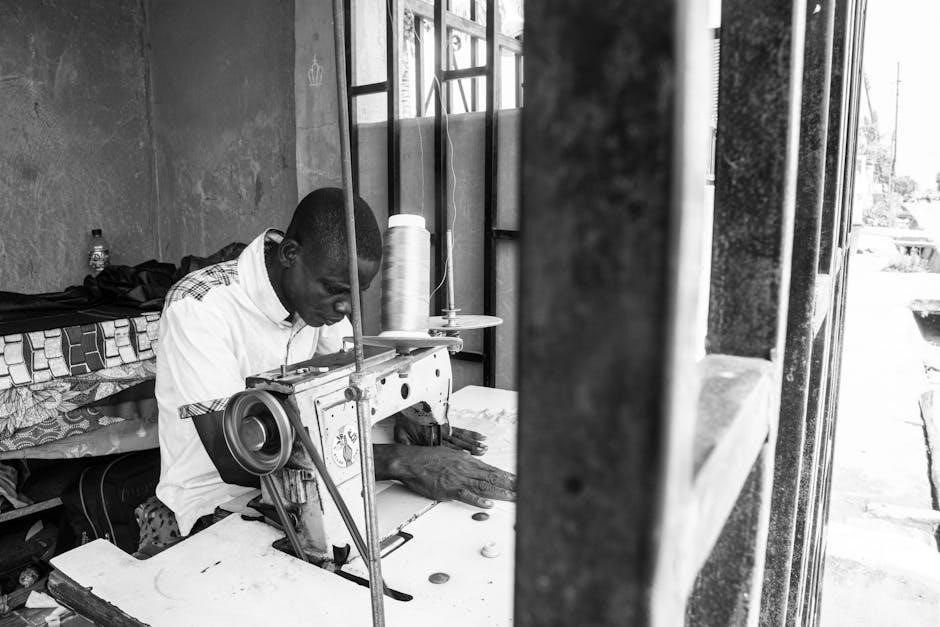
Free Arm Operation
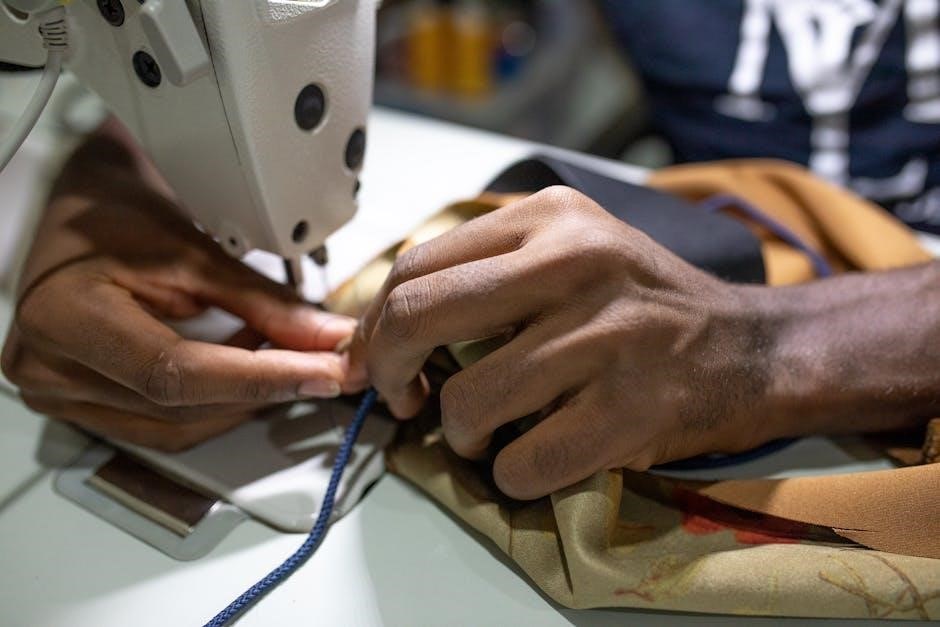
Sewing Cuffs & Sleeves: The Brother XL2600i features a removable section of the sewing bed, transforming it into a free arm. This is incredibly useful for sewing cylindrical items like sleeves, cuffs, pant legs, and collars with ease.
Enhanced Maneuverability: The free arm provides greater access and maneuverability, allowing you to guide the fabric smoothly around the curved areas. Simply slide the extension bed out from the machine to activate this function.
Versatile Sewing: This feature expands the machine’s versatility, making it suitable for a wider range of projects. Remember to reattach the extension bed when not needed for flatbed sewing.
Setting Up Your Machine
Preparation is Key: Properly setting up your Brother XL2600i involves winding the bobbin, threading both upper and lower threads, and adjusting tension correctly.
Winding the Bobbin
Preparing the Bobbin: Begin by placing the spool of thread onto the spool pin, securing it with the spool cap. Next, guide the thread through the thread guide, ensuring it’s properly seated. Then, wrap the thread several times around the bobbin, holding it firmly.
Engaging the Winder: Gently push the bobbin winder stem to the right and place the bobbin onto the bobbin winder pin. Press down on the foot controller to start winding. The machine will automatically stop when the bobbin is full.
Final Steps: Once complete, cut the thread and remove the bobbin. Ensure the bobbin is wound evenly to prevent issues during sewing. A properly wound bobbin is crucial for consistent stitch quality and smooth operation of your Brother XL2600i.
Threading the Upper Thread
Initial Steps: Begin with the machine turned off and the presser foot raised. Place your spool of thread on the spool pin, securing it with a spool cap. Guide the thread through the first thread guide, located on top of the machine.
Navigating the Thread Path: Continue threading down and around the tension discs, ensuring the thread seats firmly between them. Next, lead the thread through the take-up lever, then down and around the final thread guide.
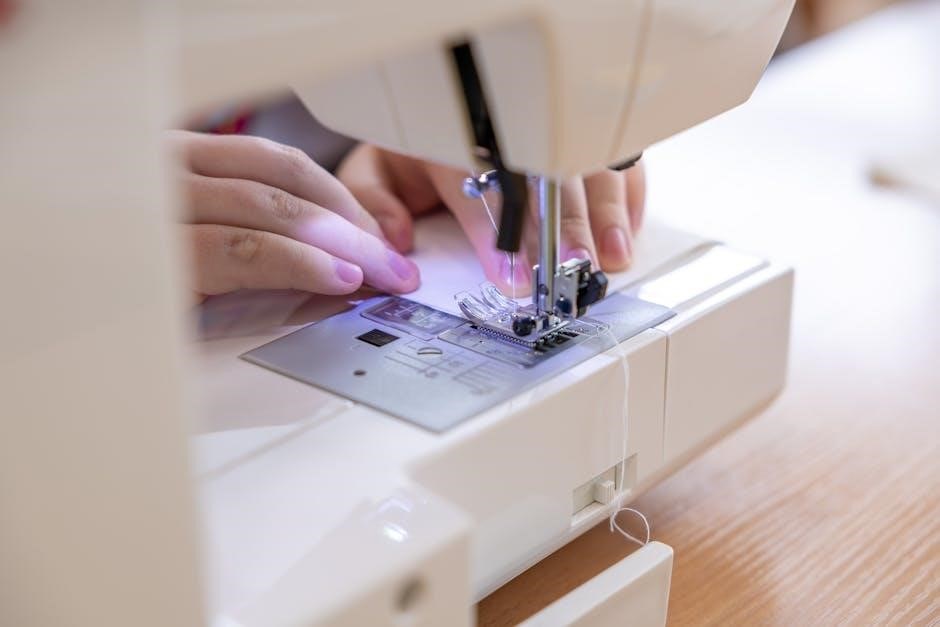
Finalizing the Threading: Finally, thread the needle from front to back. Pull a few inches of thread through the needle eye. Proper threading is vital for consistent stitch formation and preventing thread breakage on your Brother XL2600i.
Inserting the Bobbin
Bobbin Case Access: Locate the bobbin case cover on the underside of the machine and gently slide it open. Carefully remove the bobbin case. Ensure the machine is turned off before handling the bobbin area.
Bobbin Placement: Insert the pre-wound bobbin into the bobbin case, ensuring the thread unwinds in the correct direction – typically counter-clockwise. Guide the thread through the tension spring on the bobbin case.
Re-inserting the Bobbin Case: Reinsert the bobbin case back into the machine, aligning it correctly. Close the bobbin case cover until it clicks securely. Proper bobbin insertion is crucial for balanced stitches and preventing nesting.
Threading the Needle
Thread Guide Preparation: Raise the presser foot to disengage the tension discs, ensuring smooth thread flow. Follow the numbered threading path indicated on the machine, starting from the spool pin and guiding the thread through each guide.
Threading the Take-Up Lever: Carefully thread the upper thread through the take-up lever, ensuring it’s securely seated. This lever controls stitch formation, so proper threading is vital.
Needle Threading: Insert the thread through the needle eye from front to back. Use the needle threader lever (if available) for easier threading. Pull a sufficient length of thread through the needle – approximately 3-4 inches – before beginning to sew.
Adjusting Thread Tension
Understanding Tension: Proper thread tension is crucial for balanced stitches. Incorrect tension leads to looping, puckering, or thread breakage. The Brother XL2600i features a dial to control upper thread tension.
Testing Tension: Sew a sample seam on scrap fabric. Examine the stitches; if the upper thread pulls the lower thread to the underside, decrease the upper tension (lower the number). Conversely, if the lower thread appears on top, increase the upper tension (raise the number).
Fine-Tuning: Make small adjustments – one number at a time – and retest until balanced stitches are achieved. Different fabrics require different tension settings; always test before starting your project.
Basic Sewing Techniques
Mastering the Basics: This section details fundamental techniques like straight, zigzag, and reverse stitching, essential for utilizing your Brother XL2600i effectively.
Straight Stitching
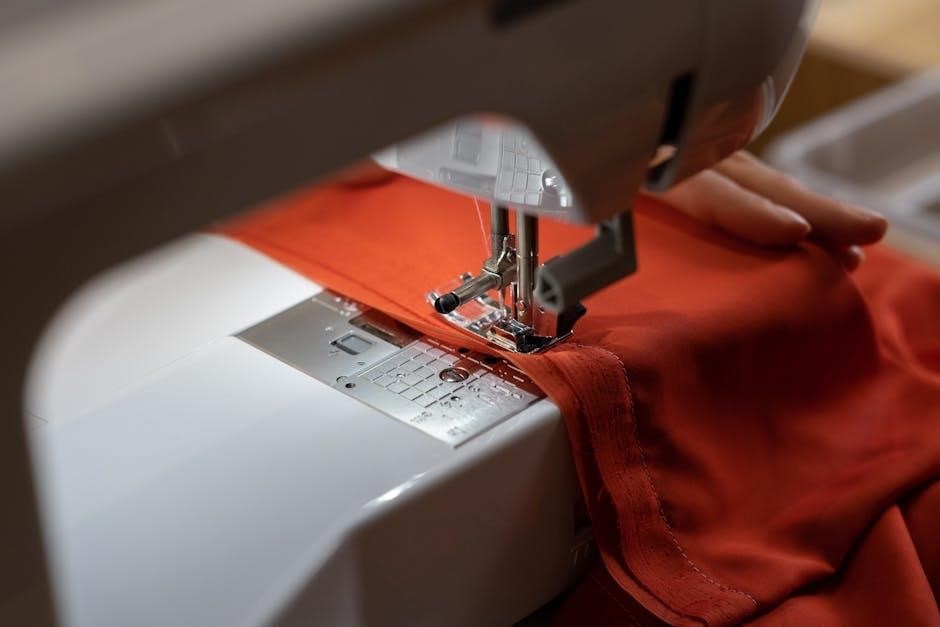
The Foundation of Sewing: Straight stitching is the most commonly used stitch, forming the basis for seams, topstitching, and basting. On your Brother XL2600i, select stitch number 1 on the stitch selection dial. Ensure your fabric is placed under the presser foot, aligned with your desired seam allowance.
Gently depress the foot controller to begin sewing at a moderate speed. Guide the fabric smoothly, avoiding pulling or pushing. Maintain a consistent seam allowance by using the markings on the needle plate as a guide. For longer seams, lift the presser foot between sections to pivot the fabric easily.
Practice on scrap fabric first to achieve even stitches and consistent results. Adjust the stitch length using the length control dial; a shorter stitch is ideal for delicate fabrics, while a longer stitch suits heavier materials. Remember to backstitch at the beginning and end of each seam to secure the stitches.
Zigzag Stitching
Versatility in Every Stitch: Zigzag stitching offers flexibility for various applications, including finishing raw edges, creating decorative effects, and sewing stretch fabrics. On the Brother XL2600i, locate the zigzag stitch options on the stitch selection dial – typically stitches numbered 2 through 6.
Adjust the stitch width using the width control dial; a wider stitch provides greater stretch and coverage. Experiment with different stitch lengths to achieve desired results. Zigzag stitching is excellent for preventing fabric fraying, especially on knit materials. When sewing stretch fabrics, use a slightly wider and longer zigzag stitch for optimal stretch and recovery.
Practice on scrap fabric to determine the best settings for your specific fabric type. Zigzag stitches can also be used for applique and decorative embellishments. Remember to test the stitch tension to ensure a balanced and secure seam.
Reverse Stitching
Securing Your Seams: Reverse stitching, also known as backstitching, is crucial for securing the beginning and end of seams, preventing unraveling. On your Brother XL2600i, engage the reverse stitch lever – typically located on the left side of the machine. Pressing this lever directs the machine to sew backward.
Begin each seam with a few reverse stitches, then continue sewing forward. At the end of the seam, reverse stitch again for a short distance. This creates a strong anchor point. The length of the reverse stitching can be adjusted; shorter reverse stitches are suitable for lighter fabrics, while longer ones provide extra security for heavier materials.
Always release the reverse stitch lever to return to forward sewing. Consistent use of reverse stitching ensures durable and professionally finished projects. Practice on scrap fabric to become comfortable with the lever’s operation and achieve neat, secure seams.
Changing the Presser Foot
Expanding Your Capabilities: The Brother XL2600i’s versatility is enhanced by its interchangeable presser feet. To change the foot, first, ensure the machine is turned off. Locate the presser foot lever at the back of the presser bar and lift it up. This releases the currently attached foot.
Press the presser foot release button, usually found on the side of the machine. Gently lower the foot until it detaches. To install a new foot, align it with the presser bar and push it upwards until it clicks securely into place. Verify it’s firmly attached before beginning to sew.
Different feet are designed for specific tasks – zippers, buttonholes, and decorative stitching all require specialized feet. Refer to your accessory kit and manual for the correct foot for your project. Proper foot installation ensures optimal sewing performance.
Advanced Features & Stitch Applications
Unlock Creativity! Explore buttonholes, zippers, overlock simulations, and decorative stitches with your Brother XL2600i, expanding your sewing possibilities significantly.
Buttonhole Sewing
Creating Professional Buttonholes: The Brother XL2600i simplifies buttonhole creation with its dedicated four-step buttonhole foot. Begin by selecting the buttonhole stitch on the stitch selection dial. Next, attach the buttonhole foot, ensuring it clicks securely into place. Position your fabric, aligning the buttonhole placement mark with the guide on the foot.
Carefully lower the presser foot and begin sewing, following the marked guidelines for each step – the machine will automatically stitch the buttonhole sides. Remember to change the buttonhole foot width according to your button size. After completing all four steps, secure the buttonhole ends with a reinforcing stitch. Practice on scrap fabric first to achieve consistent, professional-looking buttonholes every time. This feature truly elevates garment construction!
Zipper Insertion
Mastering Zipper Application: Inserting zippers with the Brother XL2600i is streamlined using the zipper foot. Attach the zipper foot – it can be positioned to the left or right, depending on the zipper side. Select a straight stitch and position the zipper teeth evenly under the presser foot. Begin sewing close to the zipper teeth, guiding the zipper pull upwards for smooth stitching.
Repeat on the opposite side of the zipper tape. For a concealed zipper, carefully understitch the zipper tape to the facing. Ensure consistent stitch length and maintain a steady sewing speed. Practice on scrap fabric with a similar zipper weight to perfect your technique. The XL2600i’s precision makes zipper insertion achievable for all skill levels!
Overlock Stitching (Simulated)
Achieving a Professional Finish: While the Brother XL2600i doesn’t have a dedicated overlock stitch, you can simulate one using a zigzag stitch. Select a narrow zigzag setting (width 3-4, length 2-2.5) and adjust the thread tension slightly to prevent puckering. Carefully guide the fabric edges under the zigzag stitch, ensuring both layers are caught with each stitch.
This creates a secure, finished edge, preventing fraying. Trimming the excess fabric close to the stitch line enhances the overlock appearance. Practice on scrap fabric to determine the optimal settings for different fabric weights. Remember, this is a simulation, but it provides a neat and durable edge for your projects!
Decorative Stitching
Adding Flair to Your Projects: The Brother XL2600i boasts a selection of decorative stitches, perfect for embellishing garments, creating unique crafts, and personalizing home décor. Explore the stitch selection dial to discover various patterns – flowers, shells, and geometric designs are readily available. Use a slightly longer stitch length for a more pronounced effect.
Experiment with different thread colors and fabric types to achieve diverse looks. Stabilizer is recommended for delicate fabrics to prevent puckering. Practice on scrap fabric before applying decorative stitches to your final project. These stitches add a beautiful, handcrafted touch to any creation!
Maintenance & Troubleshooting
Keep Sewing Smoothly: Regular cleaning and addressing common issues like thread jams or skipped stitches will ensure your Brother XL2600i operates optimally.
Cleaning the Machine
Maintaining pristine condition is crucial for longevity. Always unplug the Brother XL2600i before any cleaning procedure. Use a soft brush to remove lint and dust from the bobbin area, feed dogs, and around the needle plate. A small vacuum cleaner with a brush attachment can also be helpful for reaching tight spaces.
Periodically wipe down the exterior of the machine with a slightly damp cloth. Avoid using harsh chemicals or abrasive cleaners, as these can damage the finish. For stubborn lint buildup, a lint brush specifically designed for sewing machines is recommended. Remember to clean the thread guides regularly to prevent thread breakage and ensure smooth threading. Consistent cleaning will significantly extend the life of your machine and maintain optimal performance.
Oil Points & Lubrication
Proper lubrication ensures smooth operation and prevents wear. The Brother XL2600i requires occasional oiling, but avoid over-lubrication. Key oiling points include the bobbin race, the hook assembly, and the presser foot bar. Use only sewing machine oil – never use oil intended for other purposes.
Apply a small drop of oil to each point, then operate the machine slowly for a few minutes to distribute the oil evenly. Wipe away any excess oil to prevent staining fabric. Refer to your machine’s diagram (often found inside the access panel) for precise oil point locations. Regular, careful lubrication, performed as needed, will keep your XL2600i running quietly and efficiently for years to come.
Troubleshooting Common Issues (Thread Jamming)
Thread jamming is a frequent issue, but easily resolved; First, stop the machine and re-thread both the upper thread and the bobbin, ensuring correct threading paths. Check the thread tension – too tight or too loose can cause jams. Clean the bobbin area thoroughly, removing any lint or debris.
Ensure the needle is correctly inserted and is the appropriate type and size for your fabric. A bent or damaged needle is a common culprit. Finally, verify the presser foot is lowered, as sewing without it can disrupt thread flow. If the problem persists, consult the machine’s detailed diagrams for further assistance and preventative measures.
Troubleshooting Common Issues (Skipped Stitches)
Skipped stitches can be frustrating, but are often easily fixed. Begin by ensuring the needle is correctly inserted – it should be pushed all the way up into the needle clamp. Verify you’re using the correct needle type and size for your fabric weight; a dull or bent needle is a primary cause.
Check the threading path, confirming the upper thread is properly seated in the tension discs. Adjust the thread tension slightly; sometimes a minor adjustment resolves the issue. Also, ensure the presser foot is firmly down, as this engages the feed dogs. If skipping continues, try a new needle and re-thread the machine completely.