Iconsign Lash Lift Kit Instructions: A Comprehensive Guide
As beauty salons reopen, at-home treatments like DIY lash lifts are trending, especially this spring. Iconsign kits are gaining popularity,
generally considered safe when directions are carefully followed, offering a budget-friendly alternative.
Understanding the Iconsign Lash Lift Kit
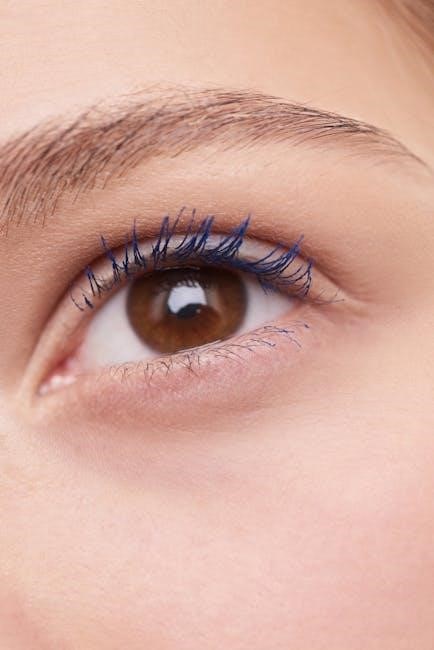
The Iconsign Lash Lift Kit is a popular choice for achieving curled, lifted lashes from the comfort of your home. Unlike traditional eyelash extensions, a lash lift essentially “perm” your natural lashes, creating a dramatic curl that lasts for weeks. This kit provides a cost-effective alternative to professional salon treatments, allowing you to maintain a beautiful, wide-eyed look without frequent appointments.
The increasing popularity stems from its convenience and perceived safety, as long as instructions are meticulously followed. It’s crucial to understand that while generally safe, improper application can lead to irritation or, in rare cases, lash damage. The kit contains various solutions designed to break down and reshape the disulfide bonds in your lashes, allowing them to be molded into a desired curl shape;
Before diving in, familiarize yourself with each component and its purpose. Understanding the chemical processes involved will empower you to achieve optimal results and minimize potential risks. This kit is designed for those comfortable with DIY beauty routines and willing to dedicate the necessary time and attention to detail.
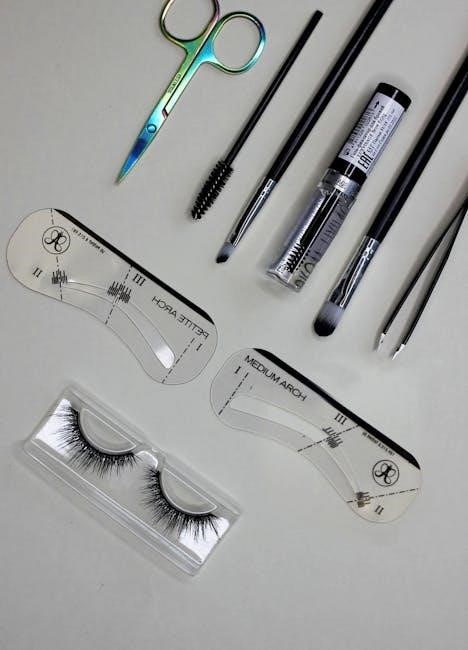
What’s Included in the Kit?
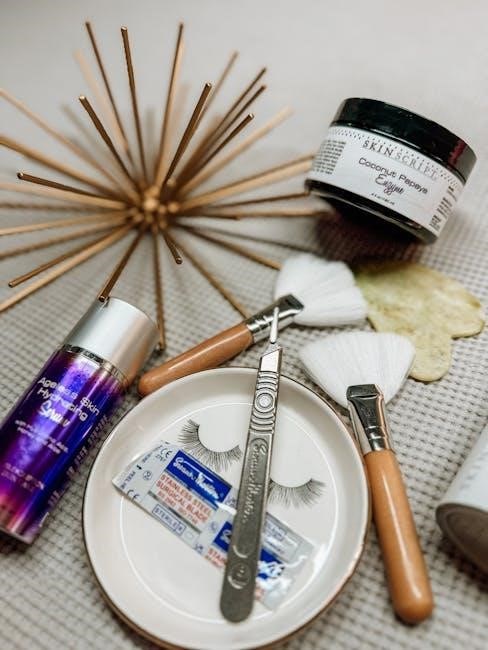
The Iconsign Lash Lift Kit typically contains a comprehensive set of tools and solutions for a complete at-home lash lift experience. You’ll find several silicone shields in varying sizes – these are crucial for shaping the curl and should be selected based on your lash length. Perm lotion is included, responsible for breaking down the lash structure for reshaping. Alongside this is the setting lotion, which locks the new curl in place.
Additional components usually include adhesive to secure the lashes to the shield, lifting rods for precise application, and disposable micro brushes for clean and hygienic product distribution. Cleansing solution is vital for prepping the lashes, and often, nutrient serum is provided for post-treatment care;
Detailed instructions are a key part of the kit, emphasizing the importance of following each step carefully. Some kits may also include a small applicator wand and eye pads to protect the under-eye area. Always verify the contents against the packaging to ensure everything is present before beginning the process.
Benefits of Using an Iconsign Lash Lift Kit
Choosing an Iconsign Lash Lift Kit offers several advantages, primarily convenience and cost-effectiveness. Performing the treatment at home eliminates the need for frequent salon visits, saving both time and money. The kits provide a budget-friendly alternative to professional lash lifts, especially appealing during times when finances are tighter, like January, as many are reviewing their budgets.
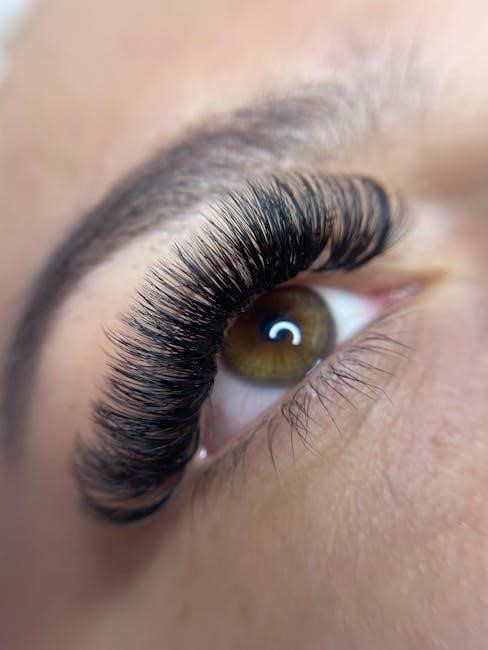
A significant benefit is the control you have over the process, allowing customization of the curl intensity to suit your preference. The results – lifted, curled lashes – enhance natural beauty, creating a wide-eyed, more awake appearance without the need for mascara.
Furthermore, these kits are generally considered safe when used correctly, adhering strictly to the provided instructions. They offer a flexible beauty routine, fitting into your schedule without appointments. The increasing popularity suggests a growing trust in the quality and efficacy of these at-home solutions, making beautifully lifted lashes accessible to more people.
Preparation for a Lash Lift
Before beginning, prioritize safety and optimal results. Thorough preparation is key, including a mandatory patch test, gathering necessary tools, and carefully prepping your natural lashes.
Patch Test: Ensuring Safety First
Performing a patch test is a non-negotiable step before your first Iconsign Lash Lift application. This crucial precaution helps determine if you have any sensitivities or allergic reactions to the kit’s formulas, preventing potential irritation or discomfort. Apply a small amount of each lotion – the perm lotion and the setting lotion – to a discreet area of skin, such as behind your ear or on your inner elbow.
Carefully follow these steps: Cleanse the chosen area thoroughly with soap and water, ensuring it’s free of any lotions or oils. Apply a tiny drop of the perm lotion and allow it to sit for the recommended time (usually around 10-15 minutes, but refer to your kit’s instructions). Rinse thoroughly with water. Repeat the process with the setting lotion.
Observe the area for 24-48 hours. Look for any signs of reaction, including redness, itching, burning, swelling, or blistering. If you experience any of these symptoms, do not proceed with the lash lift. Discontinue use immediately and consult a healthcare professional if the reaction is severe. A successful patch test guarantees a safer and more enjoyable lash lift experience.
Gathering Necessary Tools
Before commencing your Iconsign Lash Lift, meticulous preparation is key. Beyond the kit itself, assembling the right tools streamlines the process and ensures optimal results. You’ll need cotton swabs and micro brushes for precise application of the lotions, avoiding contact with the skin. A spoolie brush is essential for separating and lifting the lashes during each step.
Additional helpful tools include: A small bowl or palette for dispensing the lotions, preventing contamination of the original containers. Gentle makeup remover or oil-free cleanser to thoroughly prepare the lashes. Tweezers can assist in positioning the silicone shields accurately. A timer is crucial for adhering to the recommended processing times for each lotion, preventing over or under-processing.
Finally, have a mirror readily available, ideally a magnified one, for clear visibility. Ensure good lighting to facilitate precise application. Having all these tools within easy reach will create a smooth and efficient lash lift experience, maximizing the potential for beautiful, curled lashes.
Preparing Your Natural Lashes
Proper lash preparation is paramount for a successful Iconsign Lash Lift. Begin by removing all makeup, including mascara and eyeliner, using a gentle, oil-free cleanser. Oil residue can interfere with the lotions’ ability to effectively lift and curl the lashes. Ensure lashes are completely clean and dry before proceeding.
Next, gently brush the lashes with a spoolie to remove any lingering debris or tangled hairs. This step ensures even product distribution. Avoid using waterproof mascara for at least 24 hours prior to the lift, as it can be difficult to remove completely and may compromise the results.
If you wear contact lenses, remove them before starting the process. This prevents irritation and ensures the lotions don’t come into contact with your eyes. Thoroughly cleanse the eye area to eliminate any potential allergens or irritants. A clean canvas is essential for a safe and effective lash lift, maximizing the lift and minimizing the risk of adverse reactions.
Step-by-Step Application Guide
Achieving a perfect lash lift requires meticulous attention to detail. This guide outlines the key steps: cleansing, shield application, perm lotion, and setting lotion—follow carefully!
Step 1: Cleansing the Lashes
Before beginning the lash lift process, thorough cleansing is absolutely crucial. This step ensures optimal adhesion of the silicone shields and the lifting solutions, maximizing the effectiveness of the treatment. Begin by removing all traces of makeup from your lashes and the surrounding eye area. Use a gentle, oil-free makeup remover specifically designed for the eyes, avoiding harsh rubbing that could irritate the delicate skin.
Following the makeup removal, cleanse your lashes with a lash shampoo or a mild, fragrance-free cleanser. A specialized lash shampoo is ideal as it’s formulated to remove oils, debris, and any lingering residue without causing irritation. Gently brush the cleanser along your lash line using a clean spoolie or a soft brush, ensuring you reach the base of the lashes.
Rinse thoroughly with clean water, making sure no cleanser remains. Pat the area dry with a lint-free towel. Clean lashes are not only essential for a successful lift but also minimize the risk of irritation or allergic reactions. A pristine canvas guarantees a beautiful, long-lasting result.
Step 2: Applying the Silicone Shields
Selecting the correct silicone shield size is paramount for achieving a natural-looking and comfortable lash lift. Iconsign kits typically include a variety of shield sizes to accommodate different lash lengths and curvatures. Carefully assess your natural lash length and choose a shield that allows your lashes to comfortably rest against it without excessive bending or strain.
Gently peel the silicone shield from its backing and carefully apply it to your upper eyelid, as close to the lash line as possible, without touching the skin. Use a clean applicator or your fingertip to secure the shield in place. Ensure the shield is straight and evenly positioned on both eyes.
A small amount of adhesive is often used to further secure the shield. Apply a tiny dot of lash adhesive to the center of the shield and gently press it onto the eyelid. Once the shield is firmly in place, use a micro-swab or applicator to carefully lift and arrange your lashes onto the shield, ensuring they are evenly distributed and separated.
Step 3: Applying the Lash Lift Perm Lotion
With the silicone shields securely in place and lashes adhered, it’s time to apply the perm lotion. This is a crucial step in reshaping the lashes, so precision is key. Using a micro-brush or applicator, carefully coat the lashes from root to tip with the Iconsign perm lotion, ensuring every lash is thoroughly saturated. Avoid getting the lotion on the skin, as this can cause irritation.
The processing time for the perm lotion is critical and varies depending on lash thickness and desired lift. Typically, the lotion is left on for 8-12 minutes, but always refer to the specific instructions included with your Iconsign kit. Closely monitor the lashes during processing; do not exceed the recommended time.
After the allotted time, gently remove the perm lotion with a clean, dry micro-brush or applicator. Do not use water at this stage. Proceed immediately to the next step – applying the setting lotion – to lock in the new curl.
Step 4: Applying the Lash Lift Setting Lotion
Following the removal of the perm lotion, the setting lotion is applied to ‘fix’ the newly shaped lashes. This step is vital for ensuring a long-lasting lift. Using a fresh, clean applicator, carefully coat all lashes, again from root to tip, with the Iconsign setting lotion. Ensure complete coverage, just as you did with the perm lotion, avoiding contact with the skin.
The setting lotion typically requires a processing time of 5-8 minutes. Refer to your specific Iconsign kit instructions for precise timing, as this can vary. During this time, avoid any disturbance to the lashes to allow the solution to effectively set the curl.
Once the processing time is complete, gently remove the setting lotion with a dry applicator. Carefully remove the silicone shields from the lashes. Your lash lift is now complete! Proceed to the post-lift care instructions for optimal results and longevity.

Post-Lift Care and Maintenance
Maintaining your Iconsign lash lift requires avoiding water for 24-48 hours. Follow the ‘do’s and don’ts’ carefully to maximize results and ensure the lift’s longevity.
Avoiding Water for 24-48 Hours
Immediately following your Iconsign Lash Lift, it is absolutely crucial to avoid getting your lashes wet for a full 24 to 48 hours. This period is vital for allowing the lifting and setting solutions to fully bind and solidify the new curl shape. Water exposure during this time can prematurely weaken the curl, leading to a less dramatic or uneven lift.
This means no showering, bathing, swimming, saunas, or even washing your face with water directly over your eyes. If you must wash your face, carefully avoid the eye area, focusing on the rest of your complexion. Consider using a damp cloth to gently cleanse around your eyes, ensuring no water touches the lashes.
Tears, steam, and humidity can also impact the setting process, so try to minimize exposure to these elements as well. If you experience any unexpected tearing, gently blot your lashes with a clean, dry tissue. Patience during this initial 24-48 hour period is key to achieving and maintaining the beautiful, lifted lashes you desire from your Iconsign kit!
Do’s and Don’ts After a Lash Lift
To maximize the longevity and health of your Iconsign Lash Lift, adhere to these post-treatment guidelines. Do gently brush your lashes daily with a clean spoolie to maintain their shape and prevent clumping. Do continue your regular skincare routine, carefully avoiding the immediate eye area. Do use a lash serum to nourish and strengthen your natural lashes.
Don’t use oil-based makeup removers or mascaras, as oil can break down the lift. Opt for oil-free alternatives. Don’t curl your lashes with a mechanical curler, as this can cause breakage and damage. Don’t rub or pull at your lashes, as this can disrupt the curl and potentially lead to lash loss.
Don’t use waterproof mascara, as it requires harsh removal techniques. Prioritize gentle care and hydration to keep your lashes healthy and vibrant. Following these simple do’s and don’ts will ensure you enjoy your stunning Iconsign Lash Lift for as long as possible!
How Long Does an Iconsign Lash Lift Last?
The duration of your Iconsign Lash Lift is influenced by your natural lash growth cycle, but generally, you can expect beautiful, curled lashes for approximately 6 to 8 weeks. This timeframe varies depending on individual lash growth rates and how well you adhere to the post-lift care instructions.
Factors like avoiding oil-based products and minimizing friction contribute to a longer-lasting lift. As your natural lashes grow, the lifted curl will gradually diminish, and the treatment will naturally fade. To maintain the lifted look, a touch-up treatment is typically recommended every 8-12 weeks.
Regular use of a lash serum can also help to strengthen and nourish your lashes, potentially extending the lift’s appearance. Remember, consistent aftercare is key to maximizing the results and enjoying your stunning, lifted lashes for as long as possible!
Troubleshooting Common Issues
Despite following directions, issues like irritation, uneven lifts, or potential lash damage can occur. Addressing these promptly is crucial for safety and optimal results with Iconsign kits.
Irritation or Redness
Experiencing irritation or redness after using the Iconsign Lash Lift Kit is not uncommon, particularly for those with sensitive eyes or skin. However, it’s crucial to address this promptly to prevent further discomfort or potential damage.
First, immediately rinse the affected area thoroughly with cool, clean water for at least 15-20 minutes. Avoid rubbing your eyes, as this can exacerbate the irritation. If you wear contact lenses, remove them before rinsing.
If the redness and irritation persist beyond a few hours, or if you experience swelling, itching, or burning sensations, discontinue use of the kit immediately. Applying a cool compress to the eyelids can help soothe the area.
Consider an over-the-counter antihistamine eye drop to alleviate itching and redness, but always follow the product’s instructions carefully. If symptoms worsen or do not improve within 24-48 hours, consult a healthcare professional or ophthalmologist for further evaluation and treatment. A patch test, performed before the full application, can help identify potential sensitivities.
Remember, safety is paramount. Do not attempt to continue the lash lift process if you are experiencing adverse reactions.
Uneven Lift Results
Achieving a perfectly uniform lift with an Iconsign Lash Lift Kit requires precision and attention to detail. Uneven results can occur, often stemming from inconsistent application of the perm and setting lotions.
Ensure the silicone shields are correctly sized and adhered to your eyelids, providing a stable base for the lashes. The lashes must be fully coated with each solution, from root to tip, without any gaps or clumps.
Pay close attention to the processing times specified in the kit instructions. Under-processing can lead to a weak lift, while over-processing may cause damage. Use a timer to maintain accuracy.
If you notice unevenness immediately after removing the lotions, avoid attempting to “fix” it yourself. Gently brush the lashes into a more uniform shape, but avoid reapplying any product.
For minor unevenness, the results may improve as the lashes settle over the next 24-48 hours. If the discrepancy is significant, consider consulting a professional lash technician for correction.
Lash Damage Prevention
Protecting the health of your natural lashes is paramount when using an Iconsign Lash Lift Kit. Over-processing or improper technique can lead to breakage, dryness, and even lash loss.
Always perform a patch test 48 hours before the full application to check for any allergic reactions or sensitivities. Strictly adhere to the recommended processing times for both the perm and setting lotions; exceeding these times significantly increases the risk of damage.
Avoid pulling or tugging at your lashes during any stage of the process. Gentle application and careful removal of the solutions are crucial. Ensure lashes are thoroughly hydrated post-lift with a nourishing lash serum.
Do not use the kit if your lashes are already damaged or weakened. Wait for them to fully recover before considering another lift. Limit the frequency of lash lifts to prevent cumulative damage – a gap of 6-8 weeks is generally recommended.
Proper storage of the kit is also vital to maintain the integrity of the solutions and prevent contamination, further safeguarding your lash health.
Safety Precautions and Warnings
Prioritize safety! Always follow guidelines, avoiding kit use with sensitive eyes or skin conditions. Proper storage prevents contamination, ensuring optimal results and minimizing potential risks.
Important Safety Guidelines
Before beginning, a patch test is absolutely crucial to identify potential allergic reactions or sensitivities to the Iconsign Lash Lift Kit’s components. Apply a small amount of each lotion to a discreet area of skin, like behind the ear, and observe for 24-48 hours. If any irritation, redness, or discomfort occurs, do not proceed with the lash lift.
Strictly adhere to the recommended processing times for each lotion. Over-processing can cause significant lash damage, while under-processing will result in an ineffective lift. Never leave the lotions on longer than instructed. Ensure thorough rinsing after each step to remove all traces of the product.
Avoid getting the lotions in your eyes. If accidental contact occurs, rinse immediately and abundantly with cool water. Seek medical attention if irritation persists. Use only the provided applicators to prevent contamination and ensure precise application. Do not share the kit with others to maintain hygiene and prevent the spread of potential infections. Keep the kit out of reach of children.
When to Avoid Using the Kit
Refrain from using the Iconsign Lash Lift Kit if you experience any eye infections, inflammation, or recent eye surgery. Healing processes require undisturbed conditions, and the kit’s chemicals could impede recovery or exacerbate the issue. Similarly, avoid application if you have any skin conditions around the eye area, such as eczema or dermatitis, as the lotions may cause further irritation.
Individuals undergoing chemotherapy or radiation treatment should not use the kit due to a potentially compromised immune system and increased sensitivity. Pregnant or breastfeeding women are also advised to avoid use as the effects of the chemicals on fetal development or infants are unknown.
If you wear contact lenses, remove them before starting the procedure and do not reinsert them for at least 24 hours afterward. Do not use the kit on artificial eyelashes or extensions, as it can damage both the extensions and your natural lashes. Discontinue use immediately if you experience any adverse reactions during the process, such as burning, stinging, or excessive redness.
Proper Storage of the Kit
To maintain the efficacy and safety of your Iconsign Lash Lift Kit, proper storage is crucial. Store the kit in a cool, dry place away from direct sunlight and heat sources. Elevated temperatures can degrade the chemical components, reducing their effectiveness and potentially causing irritation.
Ensure the kit is kept out of reach of children and pets, as the lotions and solutions are not for consumption and can cause harm if ingested. Always tightly seal the individual lotion bottles after each use to prevent drying and contamination. Avoid transferring the lotions to different containers, as this can alter their composition and compromise their safety.
Check the expiration dates on all components before each use and discard any expired products. Do not store the kit in the bathroom due to the humidity. A linen closet or drawer in a cool, dry bedroom is a more suitable location. Regularly inspect the packaging for any signs of damage, and if found, discontinue use.